
Content Writer
Nov 10, 2026
2 Views
0 Comments
Preparing your automatic irrigation system for low winter temperatures is essential to prevent burst pipes, cracked valves, and costly repairs in the spring. In areas with winter freezes, water trapped inside PVC or polyethylene pipes expands as it freezes, which can easily crack or rupture the material.
Below is a step-by-step guide to winterizing and protecting your irrigation system before the temperatures drop.
Step 1: Turn off the irrigation controller
Access your irrigation controller and switch the main dial/setting to "OFF" (or activate the "Rain Delay" mode if your controller supports it and you want to keep your schedule and clock settings saved). This prevents the solenoids from attempting to open the valves during the winter.
Step 2: Shut off the main water supply
Locate the main water shut-off valve dedicated to your irrigation system (typically located near the water meter or where the line splits toward the yard) and turn it completely to the closed position.
Step 3: Drain the water from the system
Depending on your system's setup, use one of the following methods to empty the remaining water:
Manual Draining: If your system has manual drain valves installed at the ends of the lines or at the lowest points of your property, open them slowly to let the water drain out via gravity. Open any outdoor drain plugs as well.
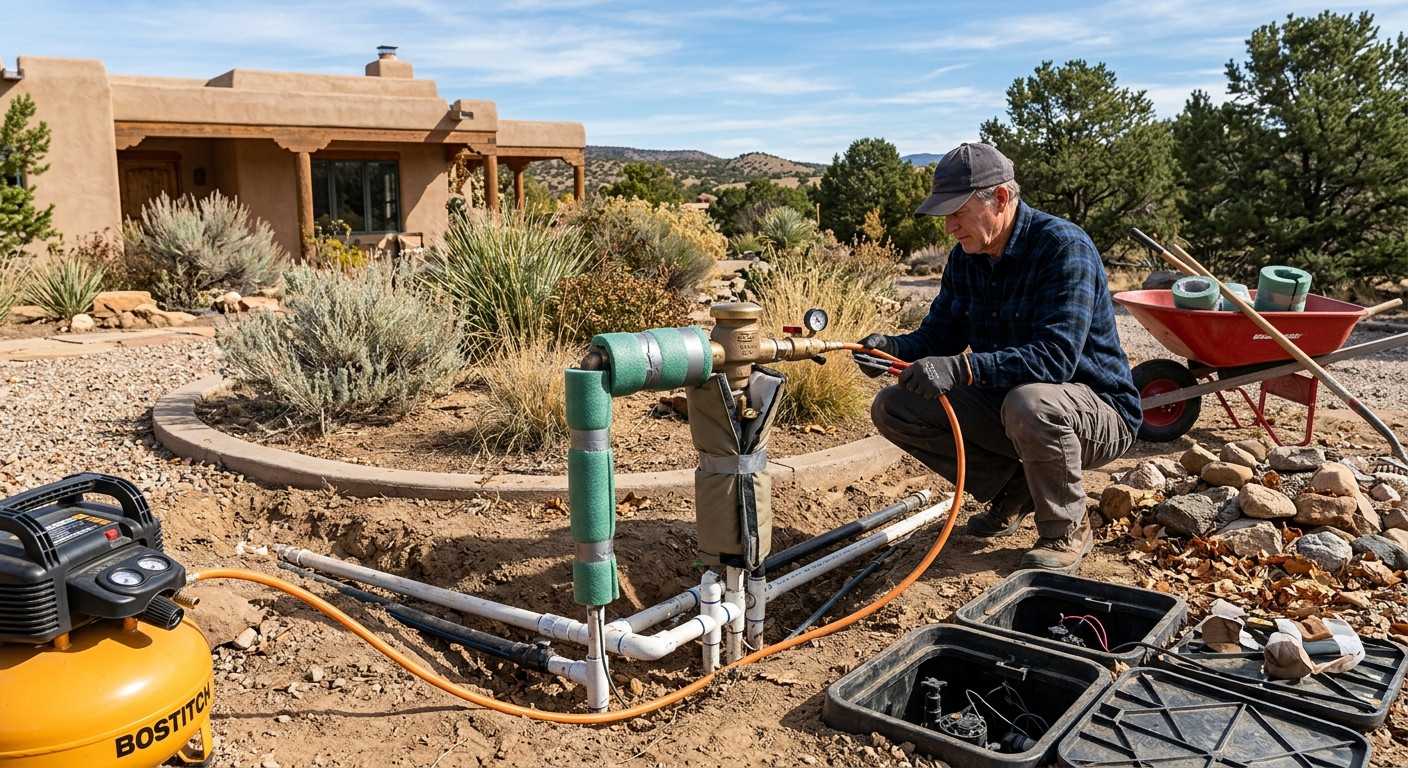
Compressed Air Blow-Out: This is the most effective method for removing residual water. A compressor is connected to the system's blow-out port (never directly through the backflow preventer without regulating the pressure) and set to a maximum of 50–80 PSI to avoid damaging the pipes. Run each zone one by one through the controller until only mist or air comes out of the sprinkler heads.
Step 4: Insulate exposed components
Components located above ground are the most vulnerable to extreme cold:
Backflow Preventer: Close the isolation valves on the device and open the test cocks at a 45-degree angle to relieve internal pressure.
Thermal Insulation: Wrap all exposed pipes, outdoor faucets, and the backflow preventer using foam pipe insulation, thermal insulating blankets, or heavy-duty outdoor covers.
Caution with Air Pressure: If you use an air compressor for the blow-out, never exceed 80 PSI for PVC pipes (or 50 PSI for polyethylene pipes). Excessive pressure or letting dry air run continuously can melt internal plastic components due to friction or cause the pipes to burst.
Below is a step-by-step guide to winterizing and protecting your irrigation system before the temperatures drop.
Step 1: Turn off the irrigation controller
Access your irrigation controller and switch the main dial/setting to "OFF" (or activate the "Rain Delay" mode if your controller supports it and you want to keep your schedule and clock settings saved). This prevents the solenoids from attempting to open the valves during the winter.
Step 2: Shut off the main water supply
Locate the main water shut-off valve dedicated to your irrigation system (typically located near the water meter or where the line splits toward the yard) and turn it completely to the closed position.
Step 3: Drain the water from the system
Depending on your system's setup, use one of the following methods to empty the remaining water:
Manual Draining: If your system has manual drain valves installed at the ends of the lines or at the lowest points of your property, open them slowly to let the water drain out via gravity. Open any outdoor drain plugs as well.
Compressed Air Blow-Out: This is the most effective method for removing residual water. A compressor is connected to the system's blow-out port (never directly through the backflow preventer without regulating the pressure) and set to a maximum of 50–80 PSI to avoid damaging the pipes. Run each zone one by one through the controller until only mist or air comes out of the sprinkler heads.
Step 4: Insulate exposed components
Components located above ground are the most vulnerable to extreme cold:
Backflow Preventer: Close the isolation valves on the device and open the test cocks at a 45-degree angle to relieve internal pressure.
Thermal Insulation: Wrap all exposed pipes, outdoor faucets, and the backflow preventer using foam pipe insulation, thermal insulating blankets, or heavy-duty outdoor covers.
Caution with Air Pressure: If you use an air compressor for the blow-out, never exceed 80 PSI for PVC pipes (or 50 PSI for polyethylene pipes). Excessive pressure or letting dry air run continuously can melt internal plastic components due to friction or cause the pipes to burst.
Category:
Landscaping
0 Comments
There are no comments on this article yet. Be the first to comment!
Leave a Reply
Your email address will not be published. Required fields are marked *